
CCTV lens selection should begin with the required target detail, viewing distance, sensor size, and field of view—not with a generic focal-length recommendation.
“What lens do I need for 20 meters?”
I hear the logic behind that question. Distance feels like the obvious starting point, and lens catalogs encourage the habit by presenting 2.8 mm, 4 mm, 6 mm, 8 mm, and 12 mm as if each number belongs to a predictable surveillance range.
It doesn’t.
A 12 mm lens isn’t a “20-meter lens.” A 2.8 mm lens isn’t automatically the right answer for a wide area either. Until focal length is tied to sensor size, target width, pixel density, mounting geometry, illumination, and the actual evidential purpose of the camera, that millimeter number tells us surprisingly little.
Here’s the ugly truth: many CCTV systems technically “cover” the scene but can’t produce useful evidence from it.
The picture looks fine on a monitor. Someone walks through the gate. You can see a human shape, perhaps a jacket color, perhaps a vehicle. Then an incident occurs, the operator enlarges the recording, and the face turns into a soft block of compression artifacts.
Too late now.
That failure usually began before installation—with a vague requirement such as “monitor this entrance” and a lens selected by habit rather than calculation.
after 500 cameras have already been assembled.
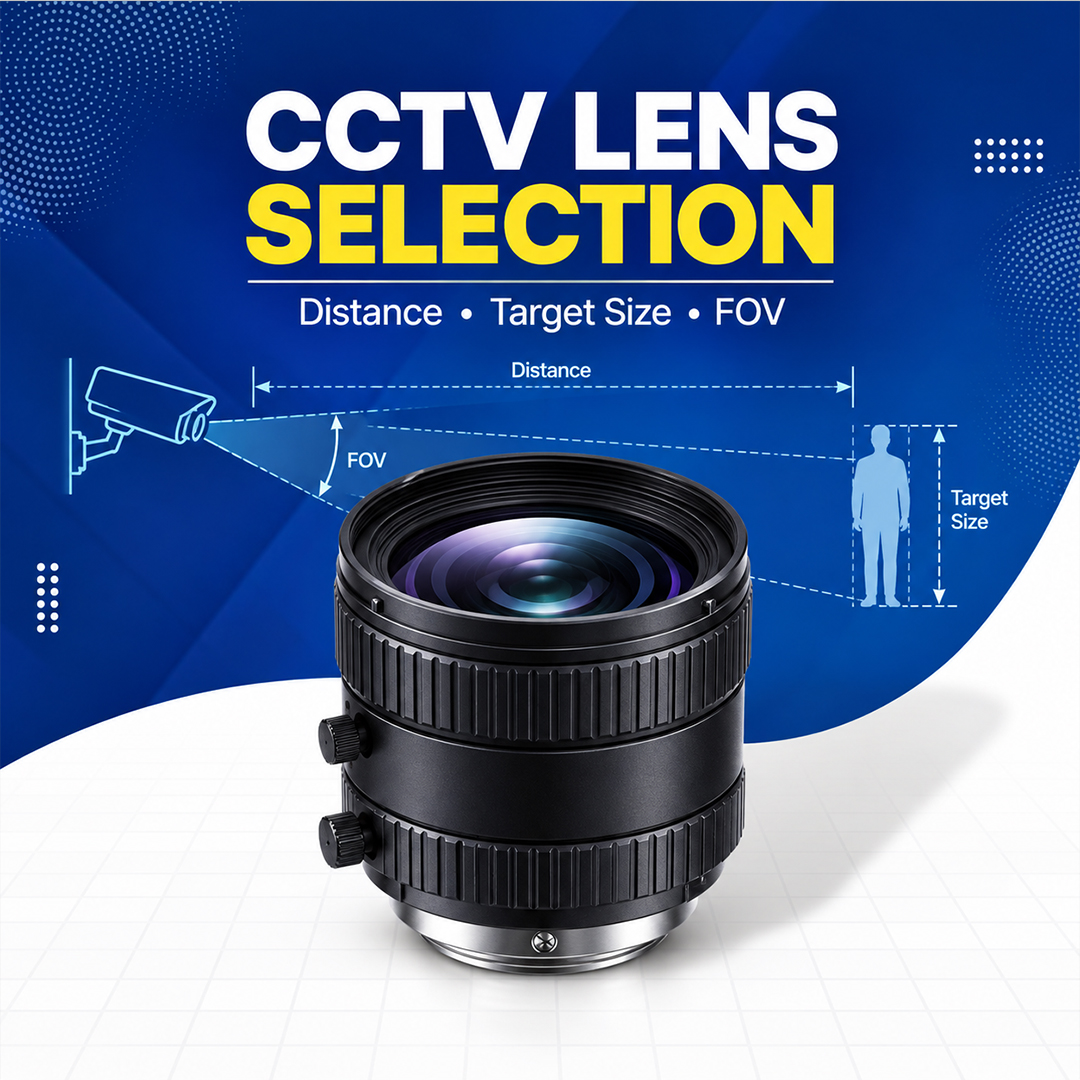
Start with the job, not the lens
I frankly believe lens selection should happen later in the design process than most buyers expect. First define what the system must prove; only then should anyone start arguing about focal length.
A practical CCTV lens selection sequence looks like this:
- Define the surveillance objective.
- Measure the real camera-to-target distance.
- Decide how much physical width the image must cover.
- Confirm the active sensor dimensions and recording resolution.
- Calculate focal length and field of view.
- Check pixel density at the target.
- Verify focus, illumination, motion blur, compression, and day/night behavior on site.
Skip one of those steps and the calculation starts wobbling.
For OEM projects, there’s another layer: chief ray angle, mount type, flange-back distance, sensor cover glass, IR-cut filter, barrel dimensions, housing-window clearance, and the tolerance stack between the PCB, holder, and lens.
That’s why two lenses marked “6 mm” can behave very differently on the same camera.
Buyers comparing complete optical assemblies should begin with purpose-designed CCTV security camera lenses, then verify the exact sensor and operating conditions. Focal length is one line on the specification sheet—not the whole specification.
What must the camera actually do?
“See a person” isn’t an engineering requirement.
Not even close.
Does the camera only need to detect that somebody crossed a boundary? Must an operator observe clothing and behavior? Does security need to recognize a known employee? Or must investigators identify an unknown individual afterward?
Those are four different jobs.
The DORI framework—Detection, Observation, Recognition, and Identification—is useful because it forces the buyer to define the job before selecting the glass. Its commonly referenced planning values are shown below.
| Surveillance objective | Common planning benchmark | What the image may support | Typical lens implication |
|---|---|---|---|
| Detection | 25 pixels per meter | Confirms that a person or object is present | Wide FOV may be acceptable |
| Observation | 62.5 pixels per meter | Shows clothing and general activity | Moderate scene width |
| Recognition | 125 pixels per meter | Supports recognition of a known person | Narrower FOV or more pixels |
| Identification | 250 pixels per meter | Captures stronger facial or object detail | Tight FOV and controlled geometry |
Useful numbers. Not magic numbers.
A design that calculates exactly 250 pixels per meter isn’t automatically an identification-grade system. Those pixels may contain motion blur, noise, defocus, compression smearing, IR overexposure, headlamp flare, or a face viewed at such a steep angle that extra resolution changes very little.
The NIST Face Recognition Technology Evaluation examines how image quality affects automated face-recognition performance. Its broader implication matters even when no facial-recognition software is installed: a nominally high-resolution image can still carry weak identity information.
And surveillance performance isn’t merely a hardware issue. In R (Bridges) v Chief Constable of South Wales Police, the UK Court of Appeal considered how automated facial recognition was governed and assessed. The judgment issued in August 2020 wasn’t about focal-length calculation, but it exposed a bigger point—camera capability, intended use, operating policy, and accountability can’t sensibly be separated.
So define the job first.
Always.
Measure the distance people usually forget
Let’s say the gate is 20 meters from the pole. Is the working distance 20 meters?
Maybe. Probably not.
If the camera sits 6 meters above the target plane and the stated 20 meters is only the horizontal ground distance, the optical distance is the hypotenuse:
D=H2+L2D=\sqrt{H^2+L^2}
Where:
- DD = optical distance
- HH = vertical height difference
- LL = horizontal distance
Using a 6-meter height difference and a 20-meter horizontal distance:
D=62+202=20.88 metersD=\sqrt{6^2+20^2}=20.88\text{ meters}
The extra 0.88 meters isn’t the main problem, though. The viewing angle is.
Mount a camera too high and the image may show a forehead, the top of a cap, or a partially hidden face. A mathematically impressive pixel count doesn’t fix bad geometry.
But installers often inherit the mounting point. The pole is already there. The cable route is fixed. Operations won’t approve another bracket. Fine—real projects are messy. In that case, we calculate with the real geometry and state what the system can and can’t deliver.
I’d reject a long-distance lens recommendation that lists focal length but omits target height, mounting height, horizontal distance, and required scene width. It’s a catalog guess dressed as engineering.
“Target size” can mean two different things
This phrase causes more confusion than it should.
Target size may mean the physical dimensions of the subject—a 160 mm face, a 500 mm license plate, or a 1.8-meter person. But for focal-length calculation, we usually need the width of the entire scene at the target plane.
Those aren’t the same thing.
Imagine a 4K camera with 3,840 horizontal pixels covering a 12-meter-wide entrance. The theoretical horizontal pixel density is:
Pixel Density=384012=320 pixels per meter\text{Pixel Density}=\frac{3840}{12}=320\text{ pixels per meter}
On paper, 320 px/m exceeds the common 250 px/m identification benchmark.
Looks comfortable.
Yet the target might stand near the edge of the frame, where the lens resolves less contrast. Electronic stabilization might crop the image. Barrel-distortion correction could stretch or discard edge pixels. The recorder might be storing a lower-resolution substream. Noise reduction may wipe away skin texture at night. The bitrate might collapse when multiple objects move through the scene.
A spreadsheet won’t warn you about those things.
That’s why I prefer a design margin, followed by an actual scene test. Designing precisely to the threshold—under perfect assumptions—is asking the installation to fail on an imperfect night.
Calculate focal length from the scene
For a rectilinear lens, we can estimate focal length from the active sensor width, working distance, and required horizontal scene width:
f=S×DWf=\frac{S \times D}{W}
Where:
- ff = focal length in millimeters
- SS = active sensor width in millimeters
- DD = distance from lens to target plane
- WW = required scene width at the target plane
Keep the units consistent. Millimeters throughout is easiest.
Suppose we have:
- Active sensor width: 6.4 mm
- Working distance: 20,000 mm
- Required scene width: 6,000 mm
Then:
f=6.4×20,0006,000=21.3 mmf=\frac{6.4\times20,000}{6,000}=21.3\text{ mm}
So the theoretical focal length is about 21.3 mm.
Will the purchasing team find a stock 21.3 mm lens? Probably not. They may find 20 mm, 22 mm, 25 mm, or a varifocal range that crosses the calculated value. That’s normal. The calculation narrows the choice; sample testing finishes it.
A CCTV lens focal length calculator makes the arithmetic faster, but calculators have a habit of producing authoritative-looking nonsense when someone enters a nominal sensor format instead of the active sensor width.
Garbage in. Clean-looking garbage out.
Field of view has three directions
A supplier says the lens offers a 100° field of view.
Which one?
Horizontal, vertical, or diagonal?
Those numbers can differ substantially, especially with wide-angle lenses. A diagonal FOV placed beside a product photo may look impressive while telling the installer very little about the width of the wall, doorway, conveyor, or road that will actually fit into the image.
For a rectilinear lens, angular field of view is calculated approximately as:
FOV=2×arctan(S2f)FOV=2\times\arctan\left(\frac{S}{2f}\right)
Where:
- SS = the relevant active sensor dimension
- ff = lens focal length
- FOVFOV = angular field of view
Use sensor width for horizontal FOV, sensor height for vertical FOV, and sensor diagonal for diagonal FOV.
Don’t mix them.
At extreme viewing angles, ordinary rectilinear assumptions also begin to lose usefulness. Fisheye CCTV lenses intentionally bend straight lines and distribute resolution unevenly across the image. A quoted 180° view may cover an enormous area, but a target close to the rim won’t receive the same useful detail as one near the center.
Coverage isn’t uniform evidence.
A worked CCTV lens selection example
Consider a distribution center with a 4-meter-wide loading gate. The camera position is 18 meters from the target plane.
The proposed camera has:
- 1/1.8-inch sensor
- 7.2 mm active sensor width
- 3,840 horizontal pixels
- Required horizontal coverage: 4 meters
- Working distance: 18 meters
Estimated focal length:
f=7.2×18,0004,000=32.4 mmf=\frac{7.2\times18,000}{4,000}=32.4\text{ mm}
Estimated pixel density:
38404=960 px/m\frac{3840}{4}=960\text{ px/m}
Nine hundred and sixty pixels per meter sounds luxurious.
And it is—mathematically.
Now place the gate beneath harsh backlighting. Add reflective vehicle paint, a moving subject, H.265 compression, a slow nighttime shutter, and an enclosure window carrying a faint film of dust. Suddenly the elegant calculation is sharing the project with physics, installation workmanship, and maintenance.
That’s the point.
The calculation tells us that a focal length near 32 mm should frame the intended width. It doesn’t certify the recorded evidence. The next step is to mount a representative camera and record actual subjects at the gate during daylight, dusk, artificial lighting, and vehicle-headlamp conditions.
No showroom demo can replace that test.
Fixed focal or varifocal?
When the camera position and target geometry are known, I generally favor a fixed focal lens for a repeatable OEM design. Fewer adjustments. Fewer moving interfaces. Less opportunity for an installer—or a vibration-prone bracket—to move the system away from its approved focus and framing.
But sites aren’t always predictable.
A varifocal lens makes sense when pole position, working distance, or required framing may change during commissioning. It lets the installer trim the view instead of replacing the lens.
The trade-off is real:
| Decision factor | Fixed focal lens | Varifocal lens |
|---|---|---|
| Focal length | One fixed value | Adjustable range |
| Installation flexibility | Lower | Higher |
| Optical repeatability | Usually stronger | Depends on adjustment and design |
| Unit cost | Usually lower | Usually higher |
| Commissioning time | Faster when geometry is known | Useful when geometry is uncertain |
| Tamper or drift risk | Lower | Higher if adjustment is not locked |
| OEM mass production | Often preferred | Useful across multiple configurations |
| Long-distance setup | Requires accurate preselection | Easier to tune on site |
For a stable production platform, fixed focal length lenses often give the cleaner manufacturing route. Where field adjustment is unavoidable, varifocal CCTV lenses can absorb installation uncertainty.
Neither is “best.”
Context wins.
Sensor size changes everything—quietly
Put the same 12 mm lens on two cameras with different active sensor widths and you’ll get two different fields of view.
The larger sensor sees more of the scene at the same focal length. To recover the narrower framing, you generally need a longer focal length.
Simple enough. Still frequently missed.
Nominal optical formats such as 1/3 inch, 1/2.8 inch, and 1/1.8 inch don’t directly state the sensor’s physical width. The naming convention is historical and rather unhelpful. Use the active-array dimensions from the sensor data sheet whenever possible.
Then check the image circle.
A lens designed around a smaller sensor may technically mount over a larger one while producing dark corners, illumination falloff, or weak off-axis MTF. The center can look sharp. The edges quietly collapse.
Compact M12 CCTV lenses deserve particular attention here. The small barrel, short mechanical stack, fast aperture, wide field, fine sensor pixels, and inexpensive threaded holder leave limited room for decentering, tilt, flange error, or casual assembly torque.
Tiny parts. Big consequences.
Be suspicious of “8 MP lens”
“5 MP.”
“8 MP.”
“4K ready.”
Those labels help buyers sort a catalog, but they don’t tell an optical engineer enough to approve a lens. There’s no universal megapixel rating that describes performance at every aperture, wavelength, field position, working distance, and sensor pixel pitch.
I frankly believe the industry leans too heavily on this shorthand because MTF curves require explanation and megapixels don’t.
A proper review asks for:
- MTF at stated spatial frequencies
- Center, mid-field, and corner results
- Sagittal and tangential performance where relevant
- Test aperture
- Test wavelength or spectral band
- Object distance
- Sensor cover-glass assumption
- Distortion
- Relative illumination
- Chief ray angle
- Focus shift across temperature
- Lens-to-lens production variation
A lens may resolve the center beautifully and smear the corners. It may perform well at F/4 but soften at its advertised F/1.6 maximum aperture. It may stay sharp in visible light and shift focus badly under 850 nm illumination.
Still “8 MP”?
The label doesn’t answer.
Long-distance CCTV is where bad assumptions get expensive
Longer focal length enlarges the target on the sensor by narrowing the scene. That’s useful. It doesn’t punch through fog, remove heat shimmer, stabilize a flexible pole, freeze a moving vehicle, or add photons to a dark target.
Long-range work is unforgiving.
Check all of this:
- Width of the target zone at the farthest distance
- Pixel density at that exact plane
- Minimum shutter speed for expected motion
- Aperture under real nighttime exposure
- Camera gain and noise reduction
- Pole and bracket rigidity
- Wind-induced movement
- Atmospheric visibility
- IR beam angle versus lens FOV
- Focus retention from day to night
- Enclosure-window reflections
- Edge resolution where the target appears
- Compression and recorder settings
Heat shimmer can ruin an apparently sharp long-lens system on a hot roadway. Rain softens contrast. Fog scatters visible and IR light. A narrow IR beam may create a bright central hotspot and leave the edges underexposed.
And then there’s focus shift.
Glass refracts visible and near-infrared wavelengths differently. A lens focused sharply in daylight can move off focus when the camera retracts its IR-cut filter and switches to an 850 nm or 940 nm illuminator. Selecting an appropriate infrared camera lens helps, but the camera, filter, lens, illuminator, aperture, and focus method still need to be tested together.
The system matters.
Wide coverage can be nearly useless
Suppose a 1,920-pixel-wide recording covers 40 meters.
192040=48 px/m\frac{1920}{40}=48\text{ px/m}
The operator sees the whole car park. Management is pleased.
Then someone asks for a face.
At 48 px/m, the system sits around detection-level territory under the common DORI planning framework. Digital zoom afterward only enlarges the 48 pixels already allocated to each meter. It can’t reveal detail that never reached the sensor.
No software miracle.
The UK government’s Surveillance Camera Commissioner Annual Report 2022–2023 discusses effective and proportionate surveillance. That idea has a practical engineering side: a camera that gives the appearance of total coverage while failing its stated evidence objective is a poor security investment.
Sometimes two cameras are the honest answer—one overview camera and one identification camera aimed at a controlled choke point.
Buyers resist that answer because it costs more.
Failed evidence costs more too.
Protective glass can quietly wreck the image
Lens calculations usually assume an unobstructed optical path. Real cameras often sit behind a dome, flat window, heated glass, or coated enclosure panel.
That extra surface changes things.
A flat window can introduce ghosting, especially when an internal IR LED reflects back toward the lens. A curved dome may soften parts of the image if the lens isn’t positioned correctly relative to the dome center. Dust, condensation, scratches, and low-grade coatings reduce contrast before the image reaches the sensor.
At night, the problem becomes obvious. Or worse—it becomes obvious only after installation.
Check the following:
- Lens-to-window distance
- Window thickness and refractive index
- Coating performance at visible and IR wavelengths
- Window tilt
- Internal baffling
- Lens hood geometry
- IR LED position
- Barrel reflections
- Seal design and condensation control
A beautifully calculated 32 mm lens behind the wrong window is still the wrong optical system.
Depth of field isn’t free
A wide aperture—say F/1.4—collects more light, which sounds ideal for CCTV. But focus tolerance becomes tighter, aberrations may increase, and corner performance can fall.
Stop the lens down and depth of field usually improves.
Then diffraction eventually enters. And the camera needs more light, more gain, or a slower shutter. More gain creates noise; a slower shutter creates motion blur.
There’s no free setting.
For a gate camera, decide whether the system must cover a narrow target plane or a deep approach zone. If faces can appear anywhere from 8 to 20 meters, a lens focused for one point may not hold acceptable detail across the full range—especially at a fast aperture.
Test the nearest and farthest target positions. Don’t just focus on the middle and hope.
What a useful RFQ should contain
“Please quote 8 MP 12 mm CCTV lens” isn’t enough for a reliable quotation.
It invites assumptions. Suppliers will fill in the missing details differently, then purchasing will compare prices as though the offers describe the same product.
They won’t.
Provide:
- Sensor manufacturer and exact model
- Active sensor width and height
- Recording resolution
- Pixel pitch
- Required horizontal and vertical FOV
- Working-distance range
- Target-zone width
- Smallest required target detail
- DORI or operational objective
- Preferred focal length or acceptable range
- Maximum distortion
- Minimum relative illumination
- Visible, 850 nm, 940 nm, or other spectral band
- Required F-number
- Lens mount
- Flange-back constraints
- Maximum barrel dimensions
- Housing-window construction
- Operating-temperature range
- Shock and vibration requirements
- Annual forecast quantity
- Sample quantity
- Acceptance-test method
That list may look demanding. Good.
For a stock item, it prevents basic mismatch. For an OEM program, it becomes the starting point for custom optical design, tolerance analysis, sample approval, golden-unit control, and production validation.
Run the scene test properly
A bench chart has value, but it isn’t the scene.
Record a real target at the minimum and maximum distances. Use expected clothing, movement speed, lighting direction, and head angle. Run the camera through daylight, dusk, darkness, and IR switching. Export footage from the actual recorder—not the clean HDMI preview.
Then inspect:
- Face or plate pixel dimensions
- Motion blur frame by frame
- Corner detail
- Focus after day/night switching
- Exposure recovery after headlight glare
- Noise-reduction smearing
- Bitrate during motion
- Image cropping caused by stabilization
- Reflections from the housing window
- Focus change after temperature stabilization
And save the evidence.
A five-minute commissioning glance at the live screen isn’t validation. The display may be downscaled, sharpened, or showing a higher-quality stream than the one being recorded.
That happens.
Specify the scene before the lens
Don’t begin with “We need a 12 mm lens.”
Begin with the gate width, target distance, sensor model, mounting height, required pixel density, lighting condition, spectral band, and evidence objective. Once those inputs are fixed, focal length stops being guesswork.
Mostly.
Send us the sensor model, recording resolution, target distance, required scene width, mounting geometry, lighting conditions, and detection or identification goal. We can evaluate focal length, field of view, sensor coverage, pixel density, IR behavior, and mechanical constraints before you approve samples—or discover the mistake after 500 cameras have already been assembled.
Frequently Asked Questions
Q.1: What CCTV lens do I need for a specific distance?
Ans:
The correct CCTV lens is the focal length that places the required target width across enough sensor pixels at the actual working distance, while matching the camera’s active sensor size, resolution, lens mount, lighting conditions, and detection, recognition, or identification objective.
Distance alone can’t answer the question. A camera 20 meters from a 3-meter gate needs different framing from one 20 meters away from a 15-meter parking entrance.
Q.2: How do I choose a CCTV lens?
Ans:
Choosing a CCTV lens means converting the surveillance objective, target dimensions, camera distance, required field of view, sensor size, pixel resolution, lighting, spectral range, and mounting constraints into a focal-length and optical-performance specification that can be verified under real installation conditions.
Start with the smallest detail that must remain usable. Calculate the scene width and pixel density, estimate focal length, and then test a real sample at the intended mounting point.
Q.3: How is CCTV lens focal length calculated?
Ans:
CCTV lens focal length is approximately calculated by multiplying the active sensor width by the lens-to-target distance and dividing the result by the required scene width, provided that every dimension uses compatible units and the lens behaves approximately as a rectilinear optical system.
The working formula is f=(S×D)/Wf=(S\times D)/W. Use the sensor’s real active width—not only the nominal 1/3-inch, 1/2.8-inch, or 1/1.8-inch format name.
Q.4: What is CCTV lens field of view?
Ans:
CCTV lens field of view is the horizontal, vertical, or diagonal angular extent captured by the camera-lens combination, determined mainly by focal length and active sensor dimensions; at a specified working distance, that angle corresponds to a measurable real-world scene width and height.
Check which FOV the supplier quotes. A diagonal number shouldn’t be used as though it were the horizontal coverage angle.
Q.5: What is the best CCTV lens for long-distance surveillance?
Ans:
The best CCTV lens for long-distance surveillance is one that produces sufficient target pixel density and contrast at the farthest required distance while controlling focus shift, distortion, vibration, atmospheric degradation, low-light exposure, sensor coverage, and day/night spectral performance within the installation’s operating conditions.
That isn’t necessarily the lens with the longest focal length. A narrow, shaky, badly illuminated image can be worse than a slightly wider but more stable and properly exposed one.
Q.6: Does a higher-megapixel lens improve CCTV image quality?
Ans:
A higher-megapixel lens improves CCTV image quality only when its real optical resolution, contrast, image-circle coverage, field performance, wavelength correction, focus accuracy, and manufacturing consistency match the sensor; a printed megapixel rating cannot correct weak lighting, compression artifacts, motion blur, incorrect exposure, or installation geometry.
Ask for MTF data, the test aperture, wavelength, field position, and working distance. “8 MP” by itself is sales shorthand.
Q.7: Should I choose a fixed or varifocal CCTV lens?
Ans:
A fixed lens is generally suited to known, repeatable camera geometry, while a varifocal lens is better when installers must adjust framing on site; the final choice depends on optical consistency, cost, commissioning flexibility, tamper risk, production volume, and whether the selected focal length can be established before installation.
For a repeatable OEM camera, fixed focal often makes sense. For an unpredictable retrofit site, varifocal adjustment may save hours of swapping lenses.